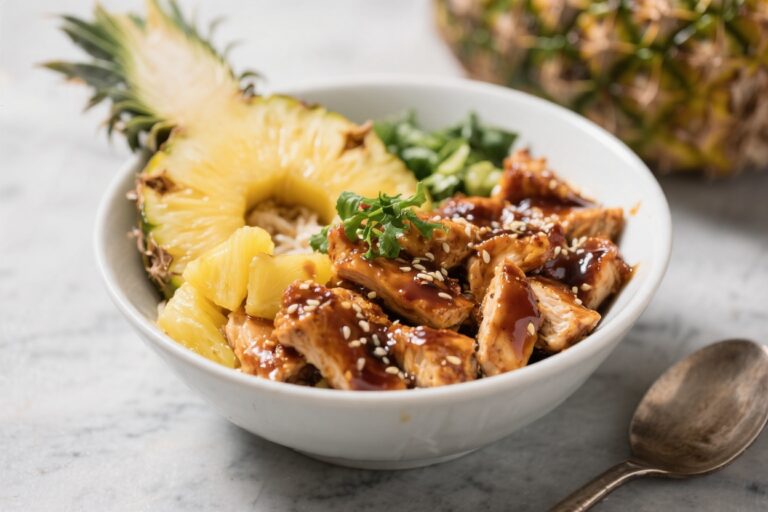
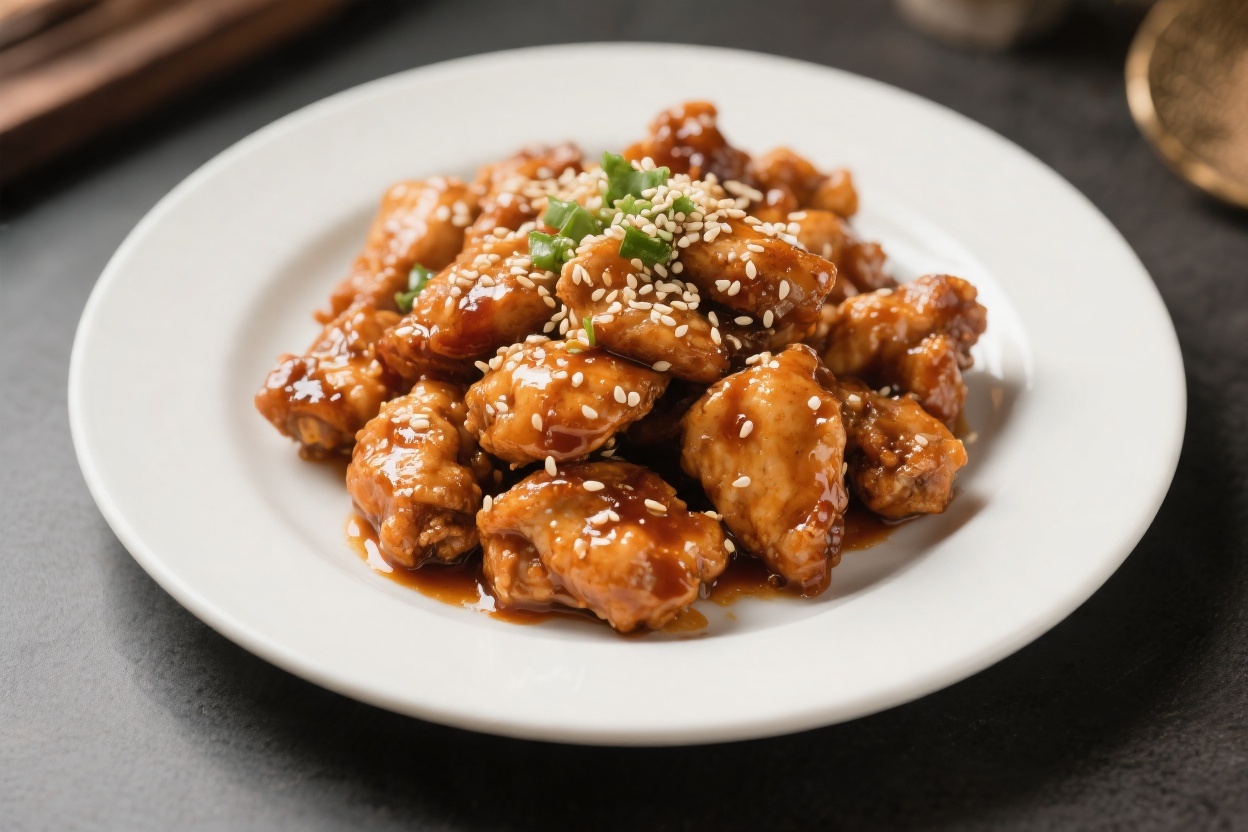
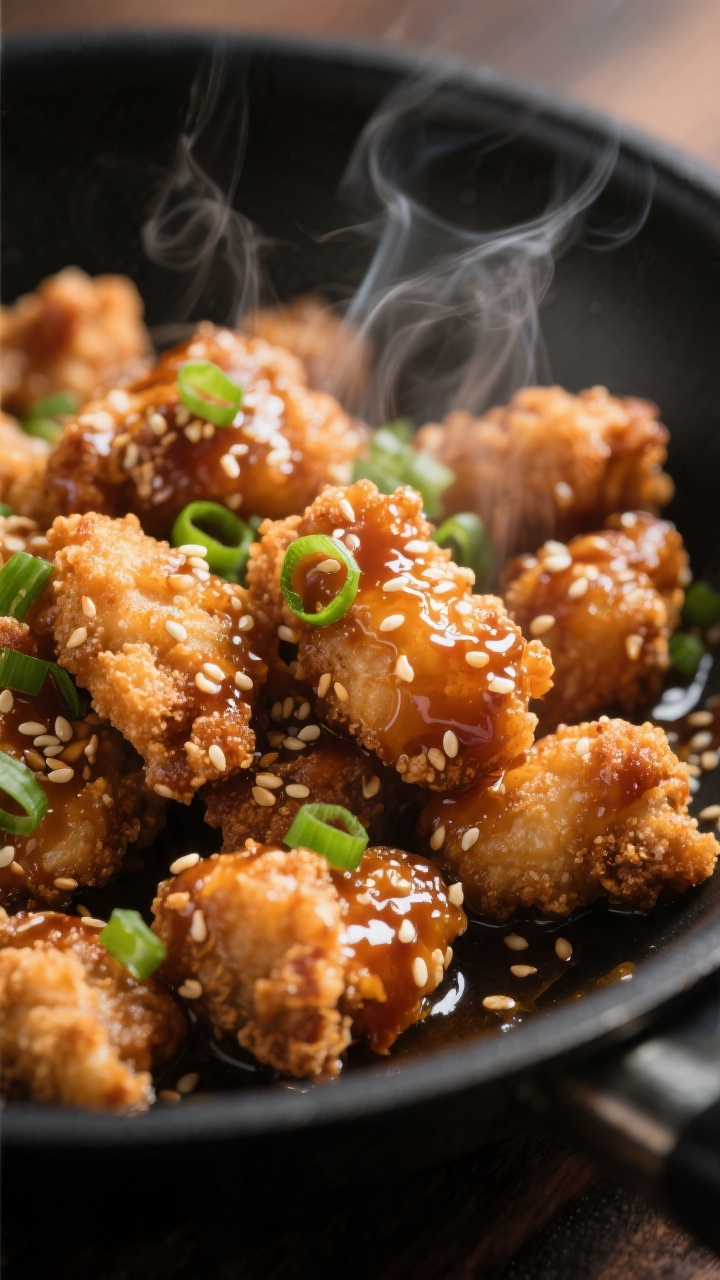
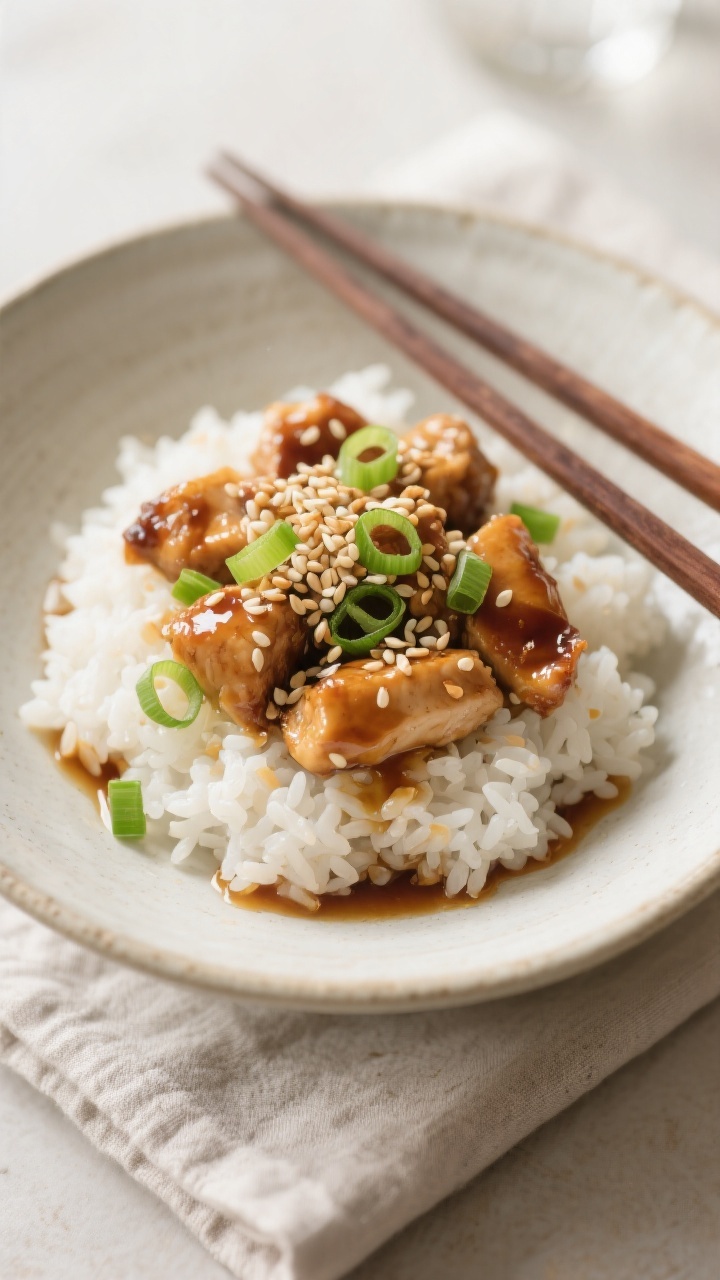
Sesame Chicken – Crispy, Saucy, and Better Than Takeout
Sesame Chicken is the kind of weeknight comfort food that never disappoints. It’s crispy on the outside, tender inside, and coated in a glossy, sweet-savory sauce with a hint of tang. The toasted sesame seeds and green onions give it that classic finish you know from your favorite takeout spot.
It’s quick to prep, simple to cook, and you don’t need any special equipment. Serve it with rice or noodles, and you’ve got a complete meal that feels special without being fussy.
Ingredients
Method
- Prep the chicken: Pat the chicken dry with paper towels. Season with salt and pepper. Toss with the beaten egg to coat.
- Coat for crispiness: In a bowl, mix cornstarch and flour. Add the chicken pieces and toss until evenly coated. Shake off excess.
- Heat the oil: Pour 1/2 inch of oil into a large skillet or wok. Heat over medium-high until shimmering. A small pinch of cornstarch should sizzle on contact.
- Fry in batches: Add chicken in a single layer, without crowding. Fry 3–4 minutes per side until golden and cooked through. Transfer to a wire rack or paper towels. Repeat with remaining chicken.
- Make the sauce base: In a bowl, whisk soy sauce, honey, rice vinegar, sesame oil, ketchup, garlic, ginger, and 1/2 cup of the water or broth.
- Thicken the sauce: Pour the sauce mixture into a clean skillet over medium heat. In a small cup, stir the remaining 1/4 cup water with 1 tablespoon cornstarch to make a slurry. Drizzle the slurry into the sauce, whisking until glossy and slightly thick, about 2 minutes.
- Coat the chicken: Add fried chicken to the pan and toss until every piece is well coated. Cook 1–2 minutes to marry the flavors.
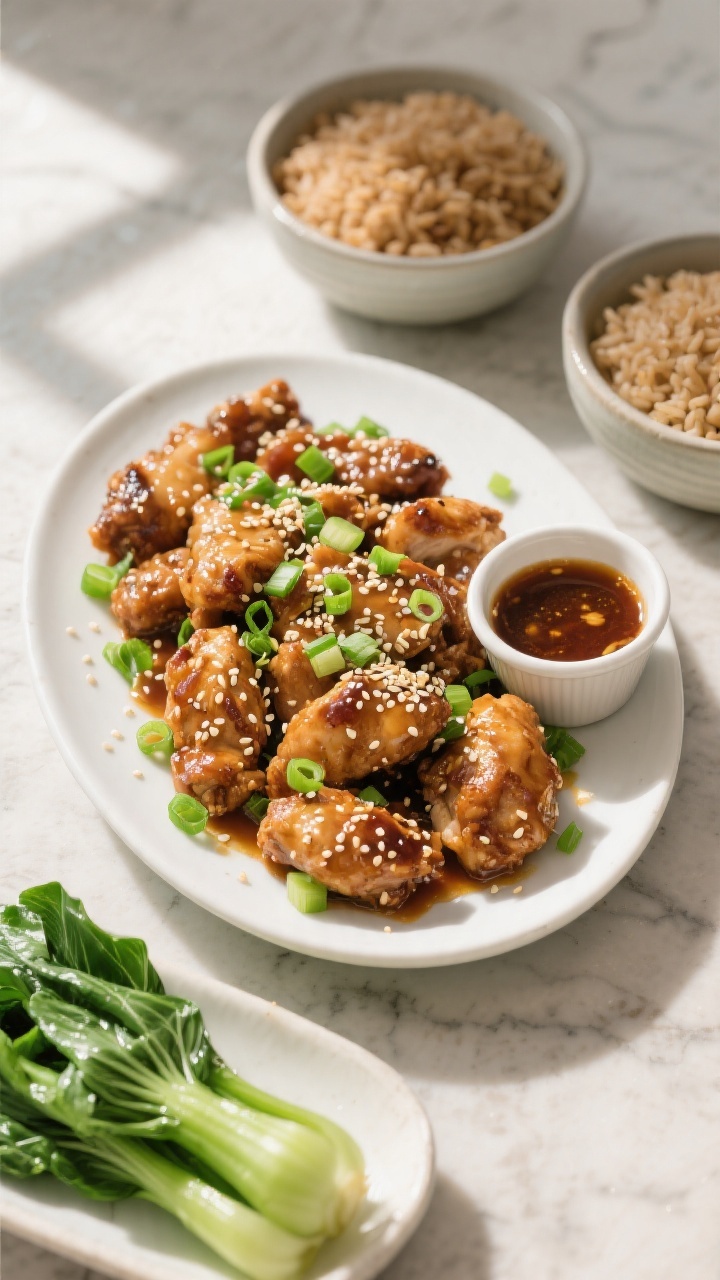
- Finish and serve: Sprinkle with sesame seeds and green onions. Serve hot over rice. For extra shine, add a tiny splash of sesame oil at the end.

What Makes This Recipe So Good
- Balanced flavor: The sauce hits sweet, salty, and tangy notes, with a gentle warmth from ginger and garlic.
- Crispy texture: A light cornstarch coating keeps the chicken crisp even after saucing.
- Everyday ingredients: Pantry staples like soy sauce, honey, and rice vinegar do the heavy lifting.
- Fast and flexible: Ready in about 30 minutes, and easy to adapt for different proteins or veggies.
- Takeout feel at home: You get that sticky, glossy finish without mystery ingredients.
Ingredients
- For the chicken:
- 1.5 pounds boneless, skinless chicken thighs (or breasts), cut into 1-inch pieces
- 1/2 teaspoon kosher salt
- 1/4 teaspoon black pepper
- 1 large egg, lightly beaten
- 1/2 cup cornstarch
- 2 tablespoons all-purpose flour (optional, for extra crunch)
- Neutral oil for frying (such as canola, vegetable, or peanut oil)
- For the sauce:
- 1/3 cup low-sodium soy sauce
- 1/3 cup honey (or brown sugar)
- 2 tablespoons rice vinegar
- 1 tablespoon toasted sesame oil
- 2 tablespoons ketchup (adds body and color)
- 2 garlic cloves, minced
- 1 teaspoon fresh grated ginger (or 1/2 teaspoon ground ginger)
- 3/4 cup water or low-sodium chicken broth
- 1 tablespoon cornstarch (for slurry)
- For finishing:
- 2 tablespoons sesame seeds, lightly toasted
- 2 green onions, thinly sliced
- Cooked white or brown rice, for serving
How to Make It
- Prep the chicken: Pat the chicken dry with paper towels. Season with salt and pepper.
Toss with the beaten egg to coat.
- Coat for crispiness: In a bowl, mix cornstarch and flour. Add the chicken pieces and toss until evenly coated. Shake off excess.
- Heat the oil: Pour 1/2 inch of oil into a large skillet or wok.
Heat over medium-high until shimmering. A small pinch of cornstarch should sizzle on contact.
- Fry in batches: Add chicken in a single layer, without crowding. Fry 3–4 minutes per side until golden and cooked through.
Transfer to a wire rack or paper towels. Repeat with remaining chicken.
- Make the sauce base: In a bowl, whisk soy sauce, honey, rice vinegar, sesame oil, ketchup, garlic, ginger, and 1/2 cup of the water or broth.
- Thicken the sauce: Pour the sauce mixture into a clean skillet over medium heat. In a small cup, stir the remaining 1/4 cup water with 1 tablespoon cornstarch to make a slurry.
Drizzle the slurry into the sauce, whisking until glossy and slightly thick, about 2 minutes.
- Coat the chicken: Add fried chicken to the pan and toss until every piece is well coated. Cook 1–2 minutes to marry the flavors.
- Finish and serve: Sprinkle with sesame seeds and green onions. Serve hot over rice.
For extra shine, add a tiny splash of sesame oil at the end.
How to Store
- Refrigerate: Cool completely, then store in an airtight container for up to 4 days.
- Reheat: Warm in a skillet over medium heat with a splash of water to loosen the sauce. You can also microwave in 30-second bursts, stirring between rounds.
- Freeze: For best texture, freeze the cooked chicken and sauce separately for up to 2 months. Thaw overnight in the fridge before reheating.
- Make-ahead tip: Fry the chicken up to a day ahead.
Re-crisp in a hot oven (400°F/200°C) for 8–10 minutes, then toss in freshly made sauce.
Health Benefits
- Lean protein: Chicken thighs or breasts offer satisfying protein for muscle support and fullness.
- Sesame seeds: Provide healthy fats, plant compounds, and minerals like calcium and iron.
- Control over ingredients: Using low-sodium soy sauce, moderating honey, and pan-frying instead of deep-frying keeps things lighter.
- Add veggies: Stir-fry broccoli, snap peas, or bell peppers for fiber and extra nutrients without much effort.
Common Mistakes to Avoid
- Crowding the pan: This drops the oil temperature and makes the coating soggy. Fry in batches.
- Skipping the cornstarch: Cornstarch is key for crispiness and that classic takeout texture.
- Over-thickening the sauce: The sauce should be glossy and pourable. Add slurry gradually and stop when it lightly coats a spoon.
- Using high-sodium soy sauce: The sauce can turn too salty fast.
Low-sodium gives you more control.
- Adding sesame seeds too early: Toast lightly and add at the end so they stay fragrant and crunchy.
Variations You Can Try
- Spicy sesame chicken: Add 1–2 teaspoons chili-garlic sauce or a pinch of red pepper flakes to the sauce.
- Orange-sesame twist: Swap half the water for fresh orange juice and add 1 teaspoon zest.
- Air fryer method: Toss coated chicken with 1–2 teaspoons oil. Air fry at 390°F/200°C for 12–15 minutes, shaking halfway, until crisp. Sauce as directed.
- Gluten-free: Use tamari or certified gluten-free soy sauce and a gluten-free ketchup.
- Baked version: Arrange coated chicken on a greased rack over a sheet pan.
Bake at 425°F/220°C for 18–22 minutes, flipping once. Toss with sauce.
- Veggie swap: Use extra-firm tofu or cauliflower florets. Press tofu well, coat, and cook the same way.
FAQ
Can I use chicken breasts instead of thighs?
Yes.
Breasts cook a bit faster and can dry out if overcooked, so keep the pieces uniform and watch the frying time. Thighs stay juicier, but both work.
What oil is best for frying?
Use a neutral, high-heat oil like canola, vegetable, or peanut oil. Olive oil isn’t ideal here because of its lower smoke point and stronger flavor.
How do I keep the chicken crispy after saucing?
Make sure the sauce is thickened before adding the chicken, and toss quickly over medium heat.
If you want extra crunch, double-fry the chicken for 1–2 minutes after the first fry.
Is there a way to cut the sweetness?
Reduce the honey to 1/4 cup and add an extra splash of rice vinegar. You can also use unsweetened broth instead of water to deepen the savory notes.
What can I serve with sesame chicken?
Steamed rice, fried rice, or noodles are classics. Add a simple side like sautéed bok choy, roasted broccoli, or a cucumber salad for contrast.
Can I make the sauce ahead?
Yes.
Mix and refrigerate up to 3 days. Whisk before heating, then thicken with the slurry just before serving.
Do I need a wok?
No. A large, heavy skillet works well.
If you have a wok, it’s great for even heat, but not required.
Final Thoughts
Sesame Chicken is one of those recipes that rewards a little prep with a big payoff. The crisp bites, shiny sauce, and nutty sesame finish taste like your favorite takeout, but you get full control over the ingredients. Keep the steps simple: hot oil, quick frying, and a balanced sauce.
With a pot of rice and a handful of green onions, you’ve got an easy, crowd-pleasing dinner any night of the week.
Printable Recipe Card
Want just the essential recipe details without scrolling through the article? Get our printable recipe card with just the ingredients and instructions.